Dynatrace Extension — Installation
Prerequisites
Section titled “Prerequisites”Before starting:
- A Dynatrace environment (SaaS) with at least one ActiveGate deployed
- The extension package matching your ActiveGate OS:
- Linux ActiveGate →
custom_teams-observability-agent-linux_X.Y.Z.zip - Windows ActiveGate →
custom_teams-observability-agent-windows_X.Y.Z.zip - Download from the GitHub Releases page
- Linux ActiveGate →
- Your current configuration values (credentials, features, intervals)
- Your Phenisys license string — the full JSON content of the license file (not the file path). See License.
- A Dynatrace API token with the
logs.ingestpermission
Step 1 — Upload the Phenisys developer certificate
Section titled “Step 1 — Upload the Phenisys developer certificate”Dynatrace only installs custom extensions that are signed by a trusted root. The MS Teams Observability extension is signed with the Phenisys developer root, so the matching certificate must be registered both at the tenant level (Credential vault) and on every ActiveGate that will run the extension. Without it, the upload in Step 2 will be rejected.
Download the certificate: ca.pem.
1a — Add the certificate to the Credential vault
Section titled “1a — Add the certificate to the Credential vault”-
Open the Credential vault on your tenant:
https://<your-tenant-id>.apps.dynatrace.com/ui/apps/dynatrace.classic.credential.vault/. -
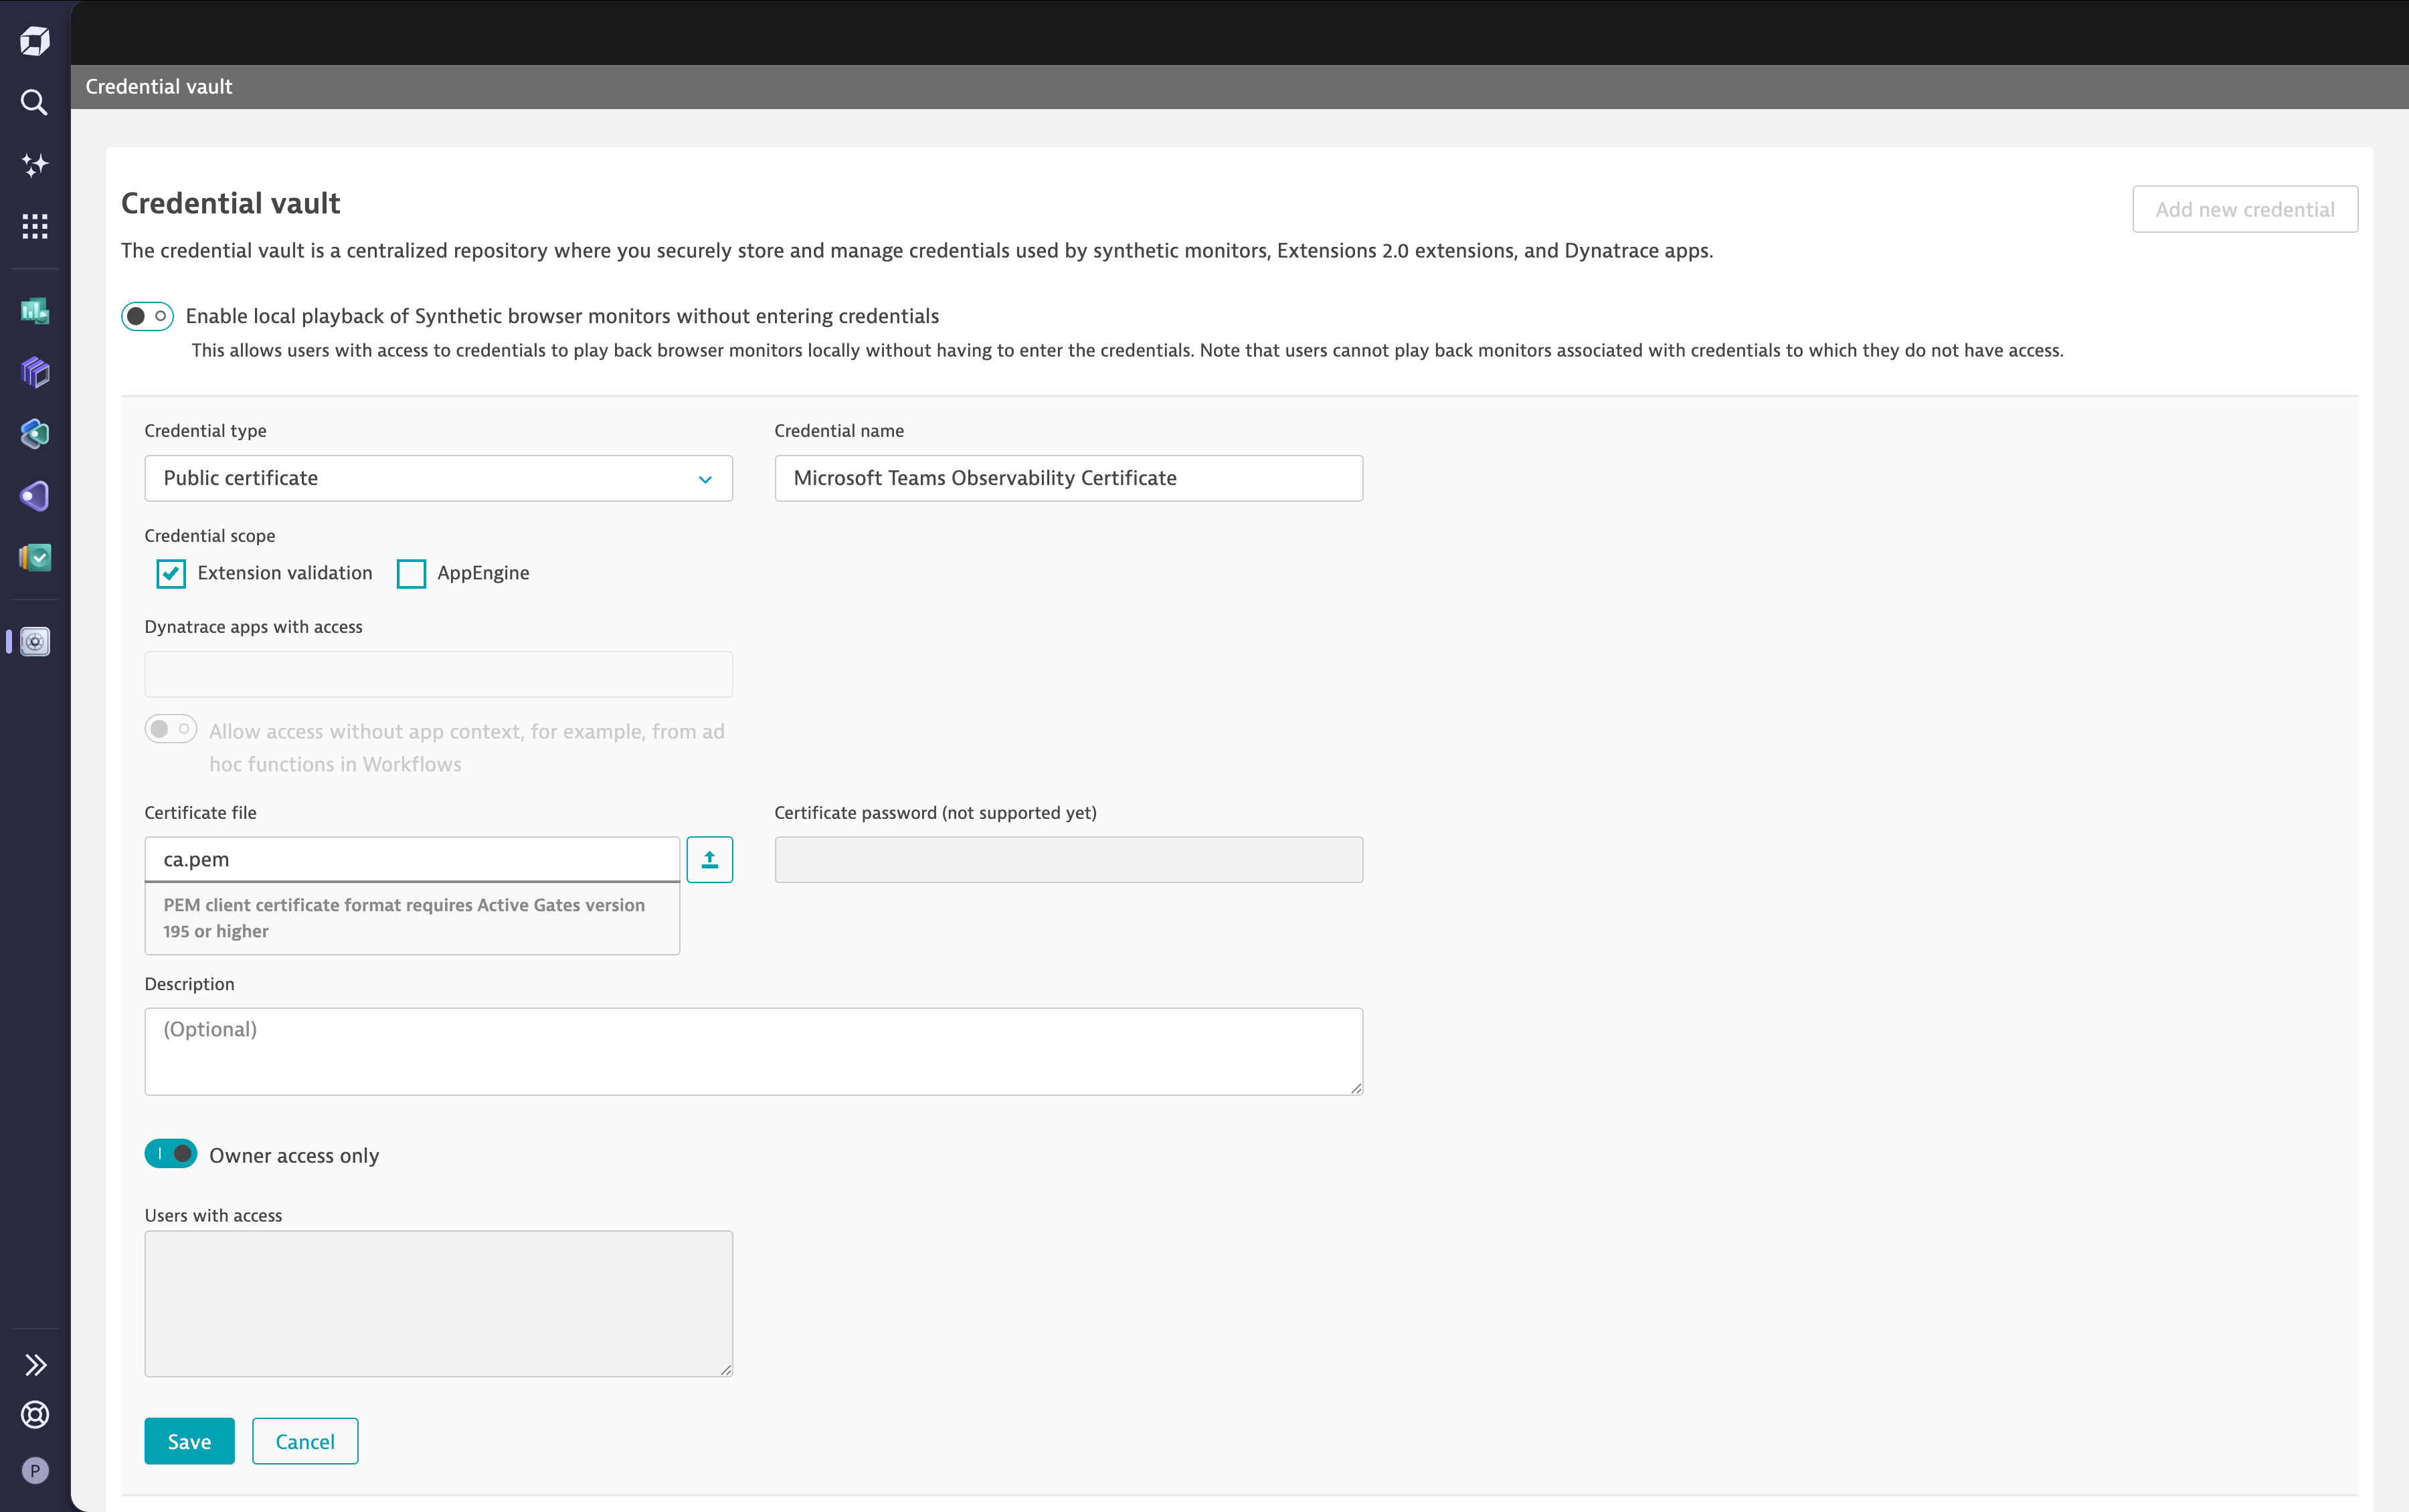
Click Add new credential and fill in:
- Credential type:
Public certificate - Credential name:
Microsoft Teams Observability Certificate(or any name you prefer) - Credential scope: tick
Extension validation - Certificate file: upload the
ca.pemyou just downloaded
- Credential type:
-
Click Save.
1b — Install the certificate on each ActiveGate
Section titled “1b — Install the certificate on each ActiveGate”Place the file at:
/var/lib/dynatrace/remotepluginmodule/agent/conf/certificates/ca.pemIt must be readable by the dtuserag user that runs the ActiveGate:
sudo install -o dtuserag -g dtuserag -m 644 ca.pem \ /var/lib/dynatrace/remotepluginmodule/agent/conf/certificates/ca.pemRestart the ActiveGate service so it picks up the new trust store:
sudo systemctl restart dynatracegateCopy the file to:
%PROGRAMDATA%\dynatrace\remotepluginmodule\agent\conf\certificates\ca.pemThe file must be accessible to LOCAL_SERVICE (the account running the ActiveGate service). Restart the Dynatrace ActiveGate service from services.msc after copying.
Step 2 — Upload the extension to Dynatrace
Section titled “Step 2 — Upload the extension to Dynatrace”-
Download the correct extension ZIP from GitHub Releases:
custom_teams-observability-agent-linux_X.Y.Z.zipfor Linux ActiveGatecustom_teams-observability-agent-windows_X.Y.Z.zipfor Windows ActiveGate
-
In Dynatrace, navigate to Extensions → Manage → Upload custom extension.
-
Upload the
.zipfile. -
Once uploaded, the extension appears in the list as
custom:teams-observability-agent-linuxorcustom:teams-observability-agent-windows.
Step 3 — Configure the extension
Section titled “Step 3 — Configure the extension”-
Open the uploaded extension and click Add configuration.
-
Select the ActiveGate group where the extension will run.
-
Fill in the configuration fields using the mapping table below.
-
Click Save.
Configuration mapping
Section titled “Configuration mapping”Use this table to map values from your existing config.yaml to the extension UI fields.
Credentials
Section titled “Credentials”| YAML field | Extension UI field | Notes |
|---|---|---|
microsoft_authentication.graph.tenant_id | Microsoft Tenant ID | |
microsoft_authentication.graph.client_id | Microsoft Client ID | Or use Credential Vault |
microsoft_authentication.graph.client_secret | Microsoft Client Secret | Or use Credential Vault |
microsoft_authentication.vaac.username | Microsoft VAAC Username | Only visible when PSTN collection is enabled |
microsoft_authentication.vaac.password | Microsoft VAAC Password | Only visible when PSTN collection is enabled |
Credential Vault (optional): Enable Use credential vault and select the vault entry that stores your Client ID (as username) and Client Secret (as password). When enabled, the individual Client ID/Secret fields are hidden.
Cloud & TLS options
Section titled “Cloud & TLS options”| YAML field | Extension UI field | Notes |
|---|---|---|
microsoft_authentication.graph.cloud_deployment | Microsoft Cloud Deployment | Supported values: global, us_gov_gcc_high, us_gov_dod, china |
advanced.ca_bundle_path | Custom CA Bundle Path | Absolute PEM path on the ActiveGate host |
Dynatrace output
Section titled “Dynatrace output”| YAML field | Extension UI field | Notes |
|---|---|---|
output.dynatrace.dynatrace_tenant_id | Dynatrace Tenant ID | The part before .dynatrace.com in your environment URL |
output.dynatrace.dynatrace_api_token | Dynatrace API Token | Must have logs.ingest permission |
License
Section titled “License”| Standalone | Extension UI field | Notes |
|---|---|---|
Content of .lic / license.json | License | Paste the full JSON string — not the file path |
Open your license file and copy its entire content into the License field. See License for format details.
Features
Section titled “Features”| YAML field | Extension UI field | Default |
|---|---|---|
collection_config.features.calls_collection.enabled | Enable calls data collection | true |
collection_config.features.pstn_calls_collection.enabled | Enable PSTN calls data collection | false |
collection_config.features.direct_routing_calls_collection.enabled | Enable Direct Routing calls data collection | false |
collection_config.features.autoattendant_collection.enabled | Enable Auto Attendant data collection | false |
collection_config.features.callqueue_collection.enabled | Enable Call Queue data collection | false |
collection_config.features.issues_collection.enabled | Enable Issues data collection | false |
Timing
Section titled “Timing”| YAML field | Extension UI field | Valid range |
|---|---|---|
collection_config.interval_collection_minutes | Interval (minutes) | 1–60 |
collection_config.max_call_duration_hours | Max Call Duration (hours) | 1–60 |
Advanced options (optional)
Section titled “Advanced options (optional)”Enable Show Advanced options in the extension UI to configure the following controls:
| YAML field | Extension UI field | Default | Valid range |
|---|---|---|---|
advanced.scheduler.respect_persisted_backoff | Advanced - Scheduler: Respect persisted backoff | true | boolean |
advanced.scheduler.backoff_buffer_seconds | Advanced - Scheduler: Backoff buffer (seconds) | 5 | 0–3600 |
advanced.calls.max_items_per_cycle | Advanced - Calls: Max items per cycle | No default (null) | 1–10000 |
advanced.calls.throttle.default_retry_after_seconds | Advanced - Calls throttle: Default Retry-After (seconds) | 120 | 1–3600 |
advanced.calls.throttle.max_backoff_seconds | Advanced - Calls throttle: Max backoff (seconds) | 1800 | 1–86400 |
advanced.calls.throttle.jitter_percent | Advanced - Calls throttle: Jitter (0.0-1.0) | 0.2 | 0.0–1.0 |
advanced.calls.throttle.escalation_multiplier | Advanced - Calls throttle: Escalation multiplier | 2.0 | 1.0–10.0 |
advanced.calls.throttle.escalation_max_seconds | Advanced - Calls throttle: Escalation max (seconds) | 3600 | 1–86400 |
advanced.calls.rate_limits.list_per_second | Advanced - Calls rate limits: LIST requests per second | 1.0 | 0.01–100.0 |
advanced.calls.rate_limits.detail_per_second | Advanced - Calls rate limits: DETAIL requests per second | 20.0 | 0.01–100.0 |
telemetry.timeout_seconds | Advanced - Telemetry: Timeout (seconds) | 10 | 1–3600 |
Step 4 — Verify data collection
Section titled “Step 4 — Verify data collection”-
Open the extension configuration in Dynatrace and check the Status — it should show Running within a few minutes.
-
In Dynatrace, go to Logs and filter by:
dt.extension.name = "custom:teams-observability-agent-linux"(or
windows). Ingested log entries from Microsoft Teams should appear. -
Confirm the data matches what you were seeing before (calls, PSTN records, etc.).
-
If the extension shows an error, check the logs on the ActiveGate host.
ActiveGate log paths
Section titled “ActiveGate log paths”Extension framework logs (startup errors, activation issues):
/var/lib/dynatrace/remotepluginmodule/log/extensions/datasources/{extension-name}/Agent logs (collection errors, Microsoft Graph API issues):
/var/lib/dynatrace/remotepluginmodule/agent/runtime/extensions/python_venvs/{extension-name}/lib/{python-version}/site-packages/teams_observability_agent/agent/logs/Replace {python-version} with the Python version in use (e.g. python3.14).
Extension framework logs:
%PROGRAMDATA%\dynatrace\remotepluginmodule\log\extensions\datasources\{extension-name}\Agent logs:
%PROGRAMDATA%\dynatrace\remotepluginmodule\agent\runtime\extensions\python_venvs\{extension-name}\Lib\site-packages\teams_observability_agent\agent\logs\In both cases, replace {extension-name} with the full extension name (e.g. custom:teams-observability-agent-linux).
Key differences to be aware of
Section titled “Key differences to be aware of”- State is reset on first run. The extension does not import the standalone agent’s previous state file. On the first run it may re-process recent calls (within
maxCallDurationhours). Duplicate events are idempotent in Dynatrace Logs, so this is safe. - Force full re-collection. If you need to force a complete re-collection, temporarily increase
maxCallDurationand restart the extension configuration. - Console and Splunk output are not supported. The extension only forwards data to Dynatrace. If you were using Splunk or console output in the standalone agent, those options are not available via the extension.